Friday, August 8, 2014

Dresser to a Buffet


My Aunt's dresser finally got a makeover, and now serves her purpose in our dinning room as a buffet (or rather she holds everything that doesn't have any other place to go). I forgot to take a good picture of the "before," but here is how she looked after having previous pull screw holes filled in prior to painting.

Before
Not picture: are the truly outdated noisy floppy pulls that had pineapples on them. Pineapples? Really?

Anyways, I decided to paint her in the Luckett's green MMS Milk Paint that I plan to paint the rest of our dinning room chairs. You can see the first chair finished here

I LOVE this paint and this color SO much. Here is a close up on the color. It is not a flat one color paint. It has various colors mixed in, so in some areas it will look a little more yellow or have these little specks of blue show up. 


MMS Milk Paint Luckett's Green

One of the great things about milk paint is that you are able to use it over a surface without stripping it (which will naturally cause that "chippy" look). I did not want the "chippy" look, so I used the bonding agent, but I still did get a couple of areas that chipped. I wanted a little bit of distressing, so I didn't worry about it too much. However, having used this paint on a stripped surface and a non-stripped surface, I recommend stripping the top coat before painting. The paint just did not want to stick to the dresser very well with the top coat on, so I ended up having to do about 2 more coats of paint that I did not have to do on my chairs. So at last here she is, and I love how she turned out: 

Refinished Dresser Turned Buffet

I switched out the pineapple pulls for some more fashionable knobs that I bought from Hob Lob! Love that store. I also did some light distressing on the edges. In the first picture of this post you can actually she an area where the paint chipped off. The chipping really wasn't too bad. 

Hob Lob Knob

I am pleased with how she turned out, and now on to the next project. 


Wednesday, July 23, 2014

Refinishing Chairs

I finally refinished my dinning room chair…and I do mean only one chair. I have three more yet to go. I am super proud of the way they turned out considering it was my first refinishing project, so I couldn't wait to share.

First I stripped the five layers of paint off. More details here.

I used Miss Mustard Seed (MMS) Milk Paint in Luckett's Green. I LOVE this paint. It is super easy to work with. It is milk paint, so it requires you to mix it with water (I used warm distilled). It is very different from other paints; it is watery and a little lumpy. I found that you really need to mix it well. It is recommended to mix for five minutes and it really needs it. By the end of my first coat the paint was looking more yellow than green because I had not mixed all the pigments well. I didn't worry about it too much because it was only the first coat.

Mixes:

1st coat: 2 tbsp of Luckett's Green; 2.5 tbsp of water; 2 tbsp of bonding agent (I did not want the paint to peel or chip which is what milk paint is known for, so I used the bonding agent that prevents this effect from occurring.) Also FYI, when using the bonding agent there is a 24 hour wait time between coats.

2nd coat: 3 tbsp of Luckett's Green; 3 tbsp of water


My father in law helped me make the seats and cushions. I covered them in a linen colored material. However I am seriously considering digging out the original seats (wood) and staining them the same color as my table top. What do you think?


MMS milk paint is natural so it can be used in doors. However I will say that I was a little surprised by the smell of it when I was mixing the paint. It smelled kind of chemically for being a "natural paint." I did not smell anything though once I started to actually paint. The smell seems to wear off fairly quickly. I love how this paint picks up and shows off the different color pigments. The paint is not just a solid green; there are places where there are more yellow or blue tones, and I love the look. 

Wednesday, July 16, 2014

Stripping

I bought these super cute dinning room chairs at the Liberty Antique Festival a year ago with every intention of refinishing them. A year later…I finally stripped my first chair! Yay! I know… a YEAR later. I can not be the only person that fantasizes about a house that looks like it just walked out of Pinterest, and during all of that time pinning (fantasizing) I collected a few projects. Life gets in the way, and a year later I finally got around to it. I wanted to share a few things about this first stripping experience….

I researched and researched. I gathered all needed materials. Then I set out to strip this chair today of its at least 5 layers of paint. Yes I will be painting these chairs again, so I guess some would say that stripping wasn't completely necessary. However, looking at the chairs I could tell that there were several layers of paint under the top white. It was very evident to me that the previous owners did not take the time to sand these chairs prior to adding a new coat of paint. Also, the paint was chipped down to the wood in certain place. I can not even imagine how much sanding would have been required to get those spots to smooth out if I didn't remove the paint. I believe that I will get a better finish by stripping the paint, but if you have more experience in refinishing feel free to suggest other options in the comments. I do have 3 more chairs yet to do.

I thought I had thought of everything, and then half way through this process I asked "What am I going to do with all this crap?" By "crap" I mean, paint chips, water that is now contaminated with paint stripper, and of course the paint stripper itself. I am still not exactly sure of the best way of disposing of these items. I guess that will require a little more research.

I did learn, however, that instead of using Jasco Paint Stripper, I will be using something a little more "green" or biodegradable next time. I am thinking about trying Citristrip.

Lessons Learned:
1) Less is not more…more is more. Lay the stuff on thick.
2) Let it sit, (but scrape before it dries). It was very tempting to me to start scrapping away as soon as the paint started bubbling, but it is better to way a little longer.
3) Use a plastic tarp, makes clean up a breeze. I did this and I am so glad I did.
4) Don't press too hard. I used a metal putty knife (which I know is a no no), but it was all I had on hand.

So finally here is my chair:


Honestly, there are still patches of paint, but since I am painting and not staining I don't think it will be a big deal. I kind of like the way it looks right now. Pretty rustic. I seriously considered doing a top coat and calling it a day, but I think in the end I will like the chairs painted green better. 

Any suggestions for paint stripping are welcomed just leave a comment. :-) 

I also found these videos, and will be taking some of their advice for the other three chairs:

https://www.youtube.com/watch?v=L8rjp6jXsAg

https://www.youtube.com/watch?v=_dTIOMtL2ko&list=UUjRQo2mDFaBa8O5Kj3t5yEw

Thursday, August 1, 2013

The New Babycakes Paper!


The new CTMH catalog is now available to shop from! In celebration of the new catalog and all the new products I am participating in the new CTMH New Product Blog Hop. 


My absolute favorite thing in the new catalog is the new Babycakes paper pack. I love the versatility of this paper. Though CTMH intend for it to be a babyish paper, I feel the color combination allows for so much more! The color focus: Chocolate, Slate, Buttercup, and Sunset (which I absolutely love, and I don't usually like orange colors).

I created a simple 4" by 4" card using the baby cakes paper. With details including some light faux stitching and banners. See the full list of supplies below:


Creativity Helpful Hint: When making paper banners I find it is easier to cut a small slit in the middle of the paper up to the height that I want my triangle cut out, and then cut from each corner to the top of my slit in the middle. 

Babycakes B&T Paper X7173
Slate Cardstock X5930 (Included in paper pack too.)
Sunset Cardstock X5758 (Included in paper pack too.)
Buttercup Cardstock 1271 (Included in paper pack too.)
Chocolate Cardstock X5643 (Included in paper pack too.)
Colonial White Cardstock 1388
“A True Thank You” Stamp M1029
Chocolate Ink Z2111
Archival Black Ink 44751
Crème Brulee Alcohol Marker (Dark) Z2406
Sanding Block Z1294
Embossed Metal Badge Button from ProPlayer Assortment Z1879
Brown Pen
White Pen


This blog hop is open for members of the CTMH Blog Boosters. Please do not enter if you are not a member of the group. Thank you. 

Friday, July 26, 2013

You are always in my heart...

As a military wife I understand what it is like to be away from a loved one. This card was made using materials from past Studio Calico card kits and CTMH Whisper Ink and Desert Sand (mostly in second generation).

Monday, November 12, 2012

Cards & Artiste Cartridge

I thought this was a great video show casing how awesome the new Artiste Cartridge is. If you would like to purchase this cartridge you can purchase it from my online website.


Sunday, October 14, 2012

Boss Day Card - Oct 16

I needed to take some time today to create something and relax. With the craziness of work lately, I have had no time for any paper craftiness time. So I decided to be productive and create this card for my boss. Boss Day is this Tuesday (October 16). I combined two different card challenges to make this card. I also used the new Cricut Artiste by Close To My Heart to create the ribbon badge. 

The Front: 


The Inside: 


Card Details: 

Colors: Sunset and Outdoor Denim (by CTMH), a retired burgundy by Stampin' Up

Color challenge came from "The Paper Players."


Layout: Challenge from "Freshly Made Sketches."

Let me know what you think. 


Sunday, September 9, 2012

MoJo Monday 257

I made this card for the MoJo Monday Contest. I used the new CTMH Clementine paper and stickers. I love this paper pack. It is very cute and girly without being too girly.


Wednesday, May 9, 2012

Flower Card

I finally got this great stamp set from CTMH. Couldn't wait to make a card with it. I also used the paper from the dotty for you paper pack a special CTMH is having now. You can get this great paper pack for only five dollars with a 35 dollar order.

Monday, January 2, 2012

MoJo Monday 222

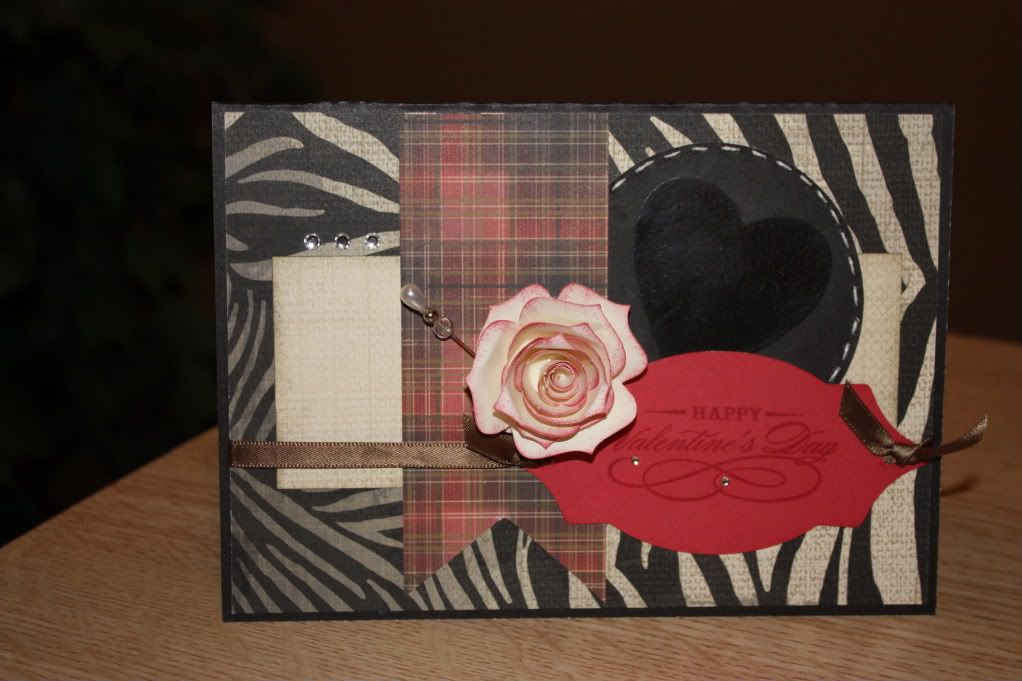
This is my MoJo Monday 222 entry.

I used the Roxie Paper Collection from CTMH.
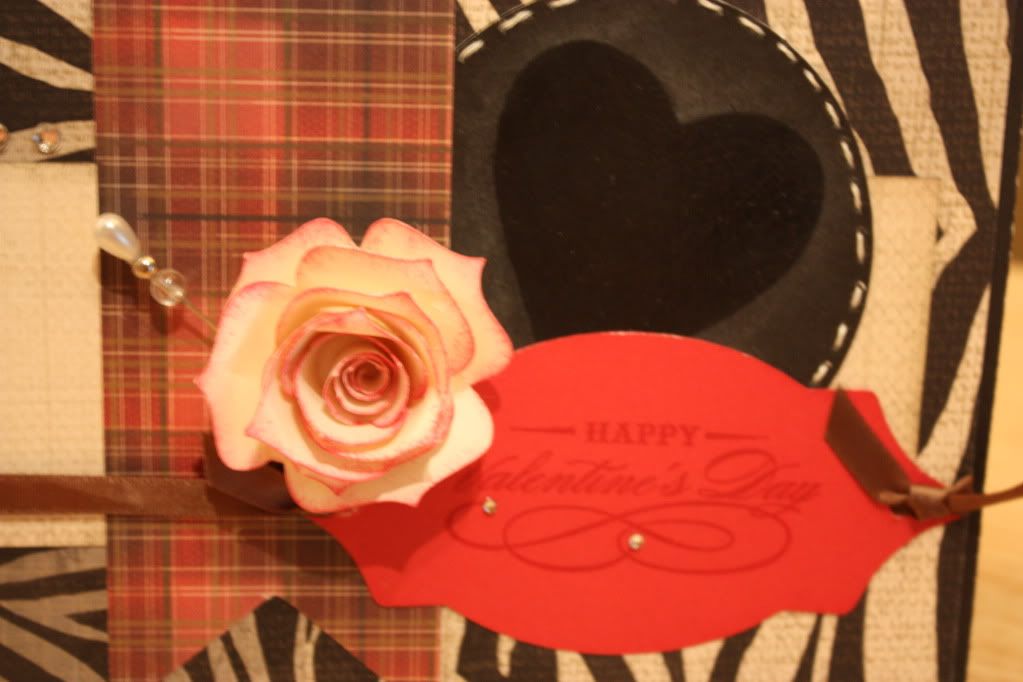
Cricut Art Philosophy for the Rose.
Bling Button Assortment for the pin.
Heat embossed the heart with clear embossing powder.


Close-Up on the Details


Not sure why the words don't show very well in this picture, but in person the words show up very nicely.

Let me know what you think. :-)

Monday, December 26, 2011

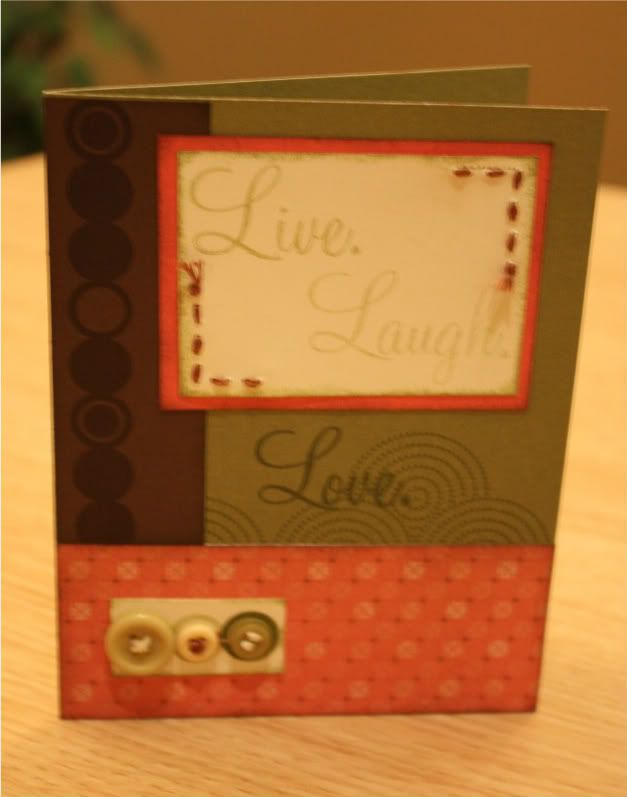
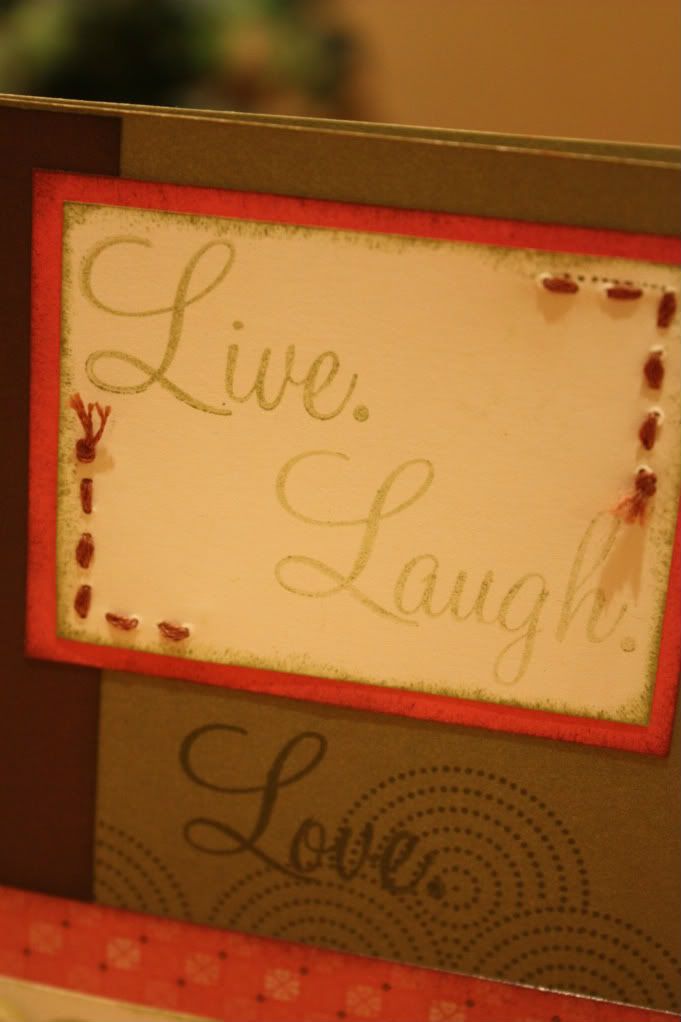
Live. Laugh. Love. Card


Details: 

Valentine Day Cards

Buckle of Love: 
Paper: Roxie (CTMH)
Stamp: Rock the Block Stamp Set 


Simple: 
**Could also serve as a "Congrats on a Wedding"


MoJo Monday 221: New Baby

I made this card for the Mojo Monday 221 challenge:

Paper: CTMH Mayberry
Stamps: Sentiment comes with Art Philosophy Cricut Cartridge, and Flower from Rock the Block Campaign Stamp Set


Details: 


Saturday, December 24, 2011

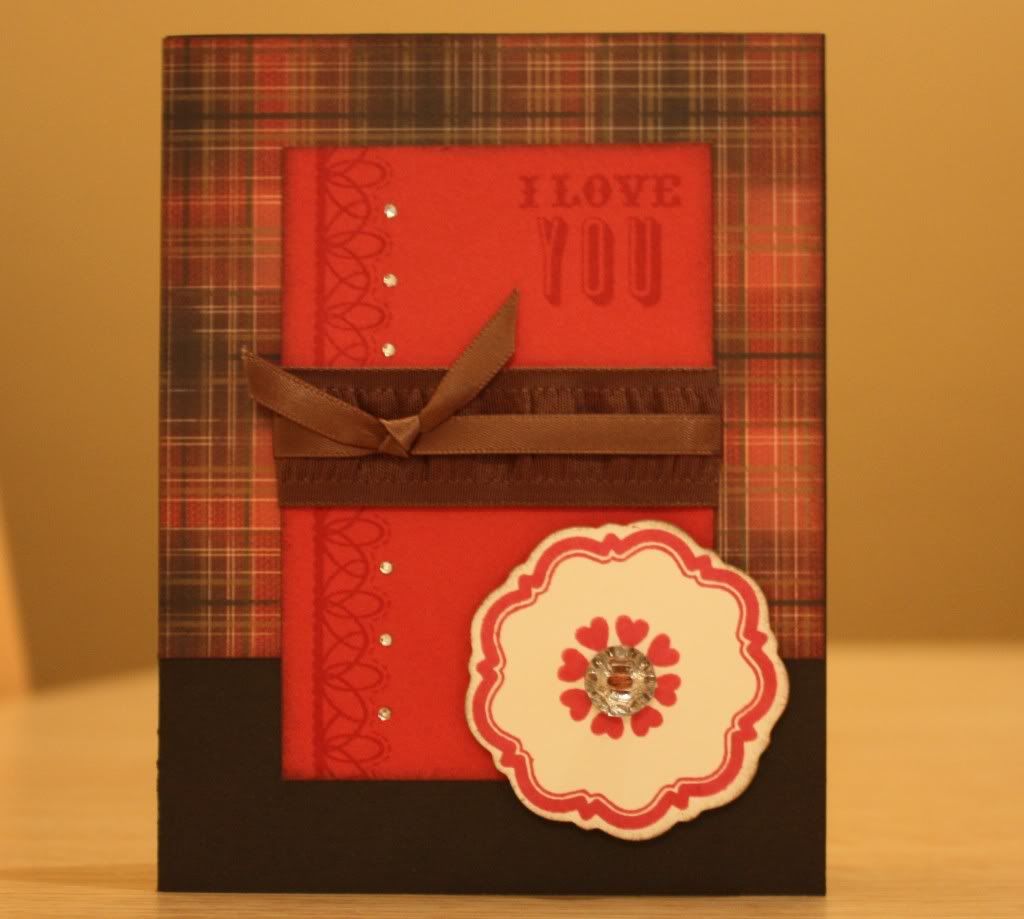
MoJo Monday 220: I Love U

All products are CTMH. 

Paper: Roxie Paper Collection
Stamps: December's Stamp of the Month "Mad About You", and "Eclectic Edges" 
Accessories: Bling Buttons, Cocoa Ribbon 

Wednesday, December 21, 2011

First Home Gathering

I will soon be having my first home gathering as a CTMH consultant. As my new products are arriving at my front door - I love each new product more than the last. I love mostly how the products coordinate so well (cutting back on endless amounts of time trying to find two paper designs that look good together - not to mention matching ink).

I can image that the amazing paper designs, idea book, and stamps can inspire even the most uncrafty individual to want to create something!

I am going to share with you the project we will be making at the first home gathering and a little thank you favor I made for my guest.

The favor:

To create the favor I used Roxie Workshop on the Go paper and materials. For the ticket I used a stamp that comes with the Art Philosophy Cricut cartridge when you buy it and cut the ticket using the cartridge too. (Oh and the boxes were cut from the same cartridge.)


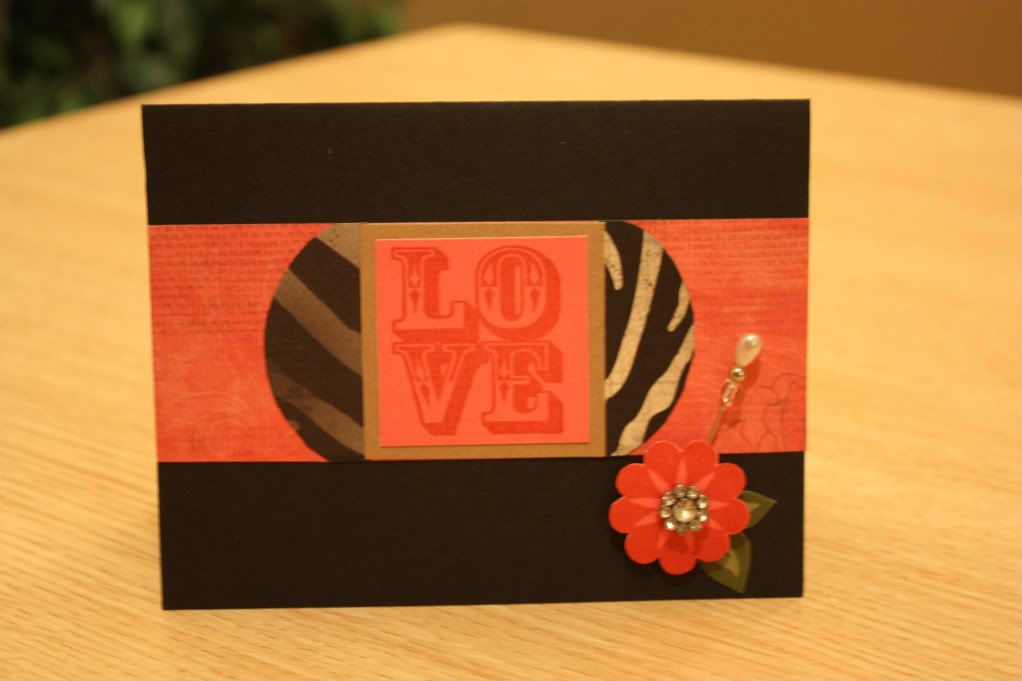
Let me just say something about the Roxie paper collection too: I have never been a fan of animal print anything. For some reason it has always brought the image of a couger to mind (and I don't mean the animal). So needless to say I never really cared for animal print anything. However, I love the Roxie paper collection (with its two animal print designs)! The designs don't seem to be too much and still soft enough to have some girly feel. Well done CTMH for changing my mind about animal prints. 

The project: 

The card that my guest will make at the home gathering uses the paper from the Elemental Workshop on the Go. (Any papers from the workshops can be purchased as packets of paper rather than the whole workshop.) Here again I used the Art Philosophy cartridge for the main stamp, and one of the stamps that came with the cartridge. I also used the Eclectic Edges stamps for the border (one of my favorite stamp sets). 


Happy Creating! 

Chores! Chores! And more Chores!

As lame as it may sound Andrew and I decided to try a chore chart to help with the normal task of having a home. Things kept getting piled up on the weekend, so we needed to figure out a way to make sure things were getting done during the week rather than being piled up on the weekend. 

I made this chore chart with an 11in by 17in poster frame. The insert that came with the frame I used as my foundation and glued my paper to it. Since the front is glass white board markers work great for writing (and erasing)! 


I used CTMH's Mayberry paper pack and Cricut Art Philosophy to cut out the letters and numbers.

Need Cheap Organization?

Any empty veggie can will do! The larger cans (those with tomato paste) are the best. 


These cans were decorated with Elemental Workshop on the Go paper by CTMH.

Tuesday, December 20, 2011

Cricut & Gypsy

Let me start by saying I love my Cricut, but it has always posed some problems that made me not want to use it as much. For example, when trying to cut the basic rectangle you have to measures (length and width), but when putting size into the Cricut there is only one dimension. Will the rectangle cut based off height or length? This is only one problem I encountered using the Cricut. I never knew what the size of my image would be, and so many times I ended up cutting the same image in multiple sizes before I got the right one.

I have been looking at the Gypsy for about a year - trying to decide if it will be worth the cost. My dear husband got it for me as a Birthday present this November. Let me tell you I do not know why I waited so long! I love this machine and it makes me love my Cricut even more. I can see my mat and how and where things will be cut. If I am not sure about the size of an image for a card front, I can simply create a rectangle the size of the card and then adjust the size of the image I want to cut based off of how it looks on the rectangle. Frames are much easier to create since you have control over where things cut on the mat.

Also, have you ever had a cut image that you loved but had some details that you didn't want? Well with the Gypsy certain lines can be deleted, so that they are not cut with the whole image. Using my Cricut is much easier and more efficient with the Gypsy. I suggest everyone gets this little tool - it multiplies your options and thus multiplies the number of images that can be cut from any cartridge. It does not come with a printed handbook, but a "short" electronic copy is provided on the Gypsy. I do suggest taking the time to read it.

Happy Creating!